Sorting Music - My First Project
The following write-up is for my music sorting code found here on my GitHub account.
UPDATE (30 Aug 2020)
By request, a Windows executable has been created. Code has been updated as well to be “Operating System Neutral” so provided all depednecies are satisfied (downloading ffmpeg for Windows users), it should be fine. See specific Windows instructions here.
Origin Story
So shortly after high school I had an HP laptop (1st mistake) that had suddenly lost its ability to charge. I didn’t have very many important documents on it, but I was bummed out that my music was locked away.
I had an iPod at the time, and fortunately iPods retain the music as randomized four-letter file names in hidden folders. Example shown below.
I had gotten a replacement computer (Toshiba, much better) and had transferred my music onto it and downloaded all the old applications I had. Originally I thought I was going to have to slowly rename my songs, but to my surprise, when I opened the files in iTunes, all the information, artist, song name, album cover, etc. were all there.
Note: I now know this is because the files retain metadata for in the form of id3 tags. At the time, the extent of my computer ‘tricks’ were pinging in the command prompt and downloading songs off limewire.
It always irked me that the files were misnamed, but I would quickly forget about it. As long as iTunes made the translation when I played the song, I was willing to postpone renaming them indefinitely.
Fast forward 10 years to the time of my budding computer savviness. I had recently switched from windows to my first Linux distro (mint… if it matters). I was making a video and wanted to use a particular song I burned from a CD (it was Korean, so there’s no way I was gonna be able to google the name to re-download it) so I set about going one-by-one through the files to find it, as I had no iTunes to translate for me. I eventually found it and made my bomb video and got a whopping 13 likes on Instagram, but I didn’t want to have to do this sort of thing again. And that’s when the inspiration originating from a divine form of laziness struck. With my newfound python and Linux superpowers, I ought to be able to automate the conversion.
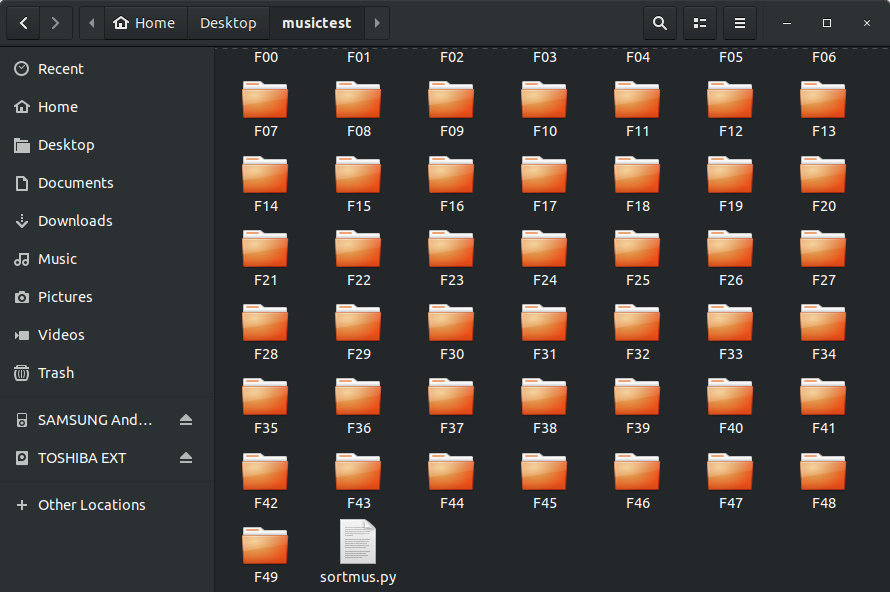 a view of the folder problem we’re dealing with
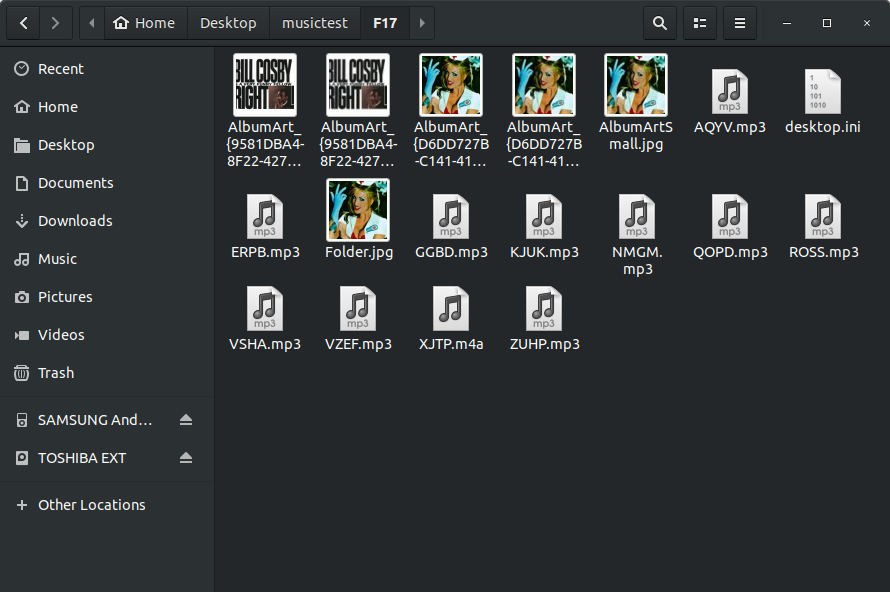 a look inside one of the folders to see how the music is arranged
Breakdown and Lessons Learned
Here’s the non-standard python libraries and Linux tools needed:
mutagen	-  pip3 install mutagen                for reading id3 tags
*avconv	-  sudo apt-get install libav-tools    for converting m4a to mp3
ffmpeg  -  sudo apt install ffmpeg 	       alternative to avconv
* avconv is deprecated at least in ubuntu 18.04, so ffmpeg is the alternative. But why the conversion? So m4a files also retain the meta data via id3 tags but the mutagen syntax doesn’t work for them, so I decided to convert. I didn’t have a preference for either format; I’m not an audio snob who cares for the slight differences in audio quality, so I elected to convert my .m4a files to .mp3. Admittedly this extra step adds time to the process (it’s almost unnoticeable with ffmpeg), but also it standardizes all my audio files to one format. And this order really jives with my inner OCD-like** tendencies, so we press on. If you want to generalize this, feel free to contribute to the source code on my GitHub.
The program, as of May 2019 now functions in one complete step thanks to os.chdir() which I wasn’t previously aware of.
The functional breakdown (as well as lessons learned during the process):
collectmus()
Creates a ‘tempunsorted’ directory subdirectory where everything will get sent to and an ‘oldm4a’ directory just in case the user is a snob and wishes to retain the .m4a format. No judgement. Searches all .m4a and .mp3 files and places them in the ‘tempunsorted’ directory, to prepare them for the transmogrification (vocab nerds unite). This is tailor-made for these F## directories only, so it won’t affect the rest. Yes it’s a little over-specialized, but that was the point. You could alter the source code to work on any and all music files and subdirectories in the current directory if you’d like. This is achieved with using the re (regular expression) library
lessons learned: use -p flag to create the parent directory if it doesn’t already exist. Saves a colossal single line in the code by calling mkdir only once (I didn’t know the power that flags held, so this was a revelation at the time).
m4a2p3()
We now move right into this ‘tempunsorted’ directory and convert the heathen files. This is where the avconv Linux command comes in. The .m4a extension name is retained so we have to use mv to rename them “oops I did it again.m4a” to “oops I did it again.mp3” (…what? Leave Britney alone!). Note: I always hated underscores, so my id3 tags definitely had spaces in the name. This is reflected in the code, where I have the variable q representing the “ character. It had to be surround in triple quotes, because doubtlessly there are songs in here with ‘ characters.
titlechange()
This is where mutagen comes in. I created an errorlist so that if anything couldn’t get converted, the user will be notified and can deal with that on a case-by-case basis. And the entire process won’t get halted because of a single rogue file.
sortbyartist()
uses mutagen again to read the id3 tags and compiles a list of all unique artists (Sorry, if you didn’t have OCD-like tendencies** in setting your old id3 tags, you’ll just have to deal with getting “N’sync” and “Nsync” lumped as different artists)
Demo / Code in Action
Here it is in action sorting my old music files (please no judgement on my music choices).
You may notice that not everything was sorted, this is because I rather disliked having a single artist with a single song listed, so I tended to lump those together. In this particular case, the id3 tags read ‘rap/hip-hop’ which bash is interpreting as the folder ‘rap’ with the subfolder ‘hip-hop’ which doesn’t exist, so the mv won’t work. As a learning point, what single line bash command can we use to do this? Bonus points if you can do it without calling the directory name twice. Take a guess before glancing below.
.
.
.
.
.
.
.
.
.
.
.
mkdir rap-hip-hop && mv *.mp3 $_
the $_ variable refers to the last argument of the previous command, in this case, the directory that was just created. Also, if you don’t know already, && will perform the 2nd command ONLY IF the first one was completed successfully
Update 30Aug2020: Works in Windows now
So that’s the breakdown. I enjoyed making it and I hope it can help anyone else to recover their old Britney and obscure Korean music.
** Sorry to perpetuate the misuse of an actual psychoneurotic behavioral disorder, it’s just so colloquial at this point. No offense to actual sufferers.
Comments
I just found this program as my daughter found her old 30GB Ipod and wanted to get all the content removed so she could use it on other devices. This little program worked great, after I had a little help from the creator, I’m not to swift with computers. Anyway great help and a super program for listing all content and converting to MP3 format.
Hey Julien, I hope you check back here, I’m working on editing the code to make it “OS neutral”, something I wasn’t concerned with way back when I wrote this the first time.
I say that I hope you check back because I realize I haven’t enabled email alerts yet to responses on this blog (I’m not very good at web stuff). I hope to get you a working Windows executable and to get these comment reply emails working within in the next few days. Best regards :]
Hey, thanks for your work ! I have the same issue here, I managed to recover my songs but they have crypted name as “XXXX”, my question is : Is it possible to do your program on windows 10? Cheers